Top Underwater Photography Tips for Stunning Shots in 2025

The underwater world offers a breathtaking canvas of vibrant reefs, mesmerizing creatures, and ethereal light. Yet, capturing its beauty presents a unique challenge that frustrates many aspiring photographers. Water fundamentally changes the rules of photography: it filters sunlight, distorts color, and makes stability a constant pursuit. This guide moves beyond the basics to provide actionable, professional-level underwater photography tips that will transform your images from blurry, blue-washed snapshots into sharp, vibrant memories.
Whether you're exploring the shallow reefs of the Florida Keys on a snorkeling trip in Marathon or diving into deeper waters, these techniques are designed for immediate impact. We will cover the essential skills needed to conquer the aquatic environment, from mastering buoyancy for crystal-clear focus to understanding the physics of light and color correction. You will learn specific camera settings, compositional rules, and the importance of getting close to your subject.
This is not just a list of ideas; it's a practical roadmap. We'll dive into how to use external strobes, the benefits of shooting in RAW format, and the ethical practices that protect the very environment we love to photograph. By the end, you will have a comprehensive toolkit to bring back photos that truly capture the magic you witnessed beneath the surface.
1. Master Buoyancy Control for Sharp Images
Before you even think about f-stops or shutter speeds, the single most critical skill for incredible underwater photography is mastering buoyancy. This is the foundation upon which every other technique is built. Proper buoyancy control allows you to achieve a state of neutral weightlessness, where you neither sink nor float. This stability is the secret to eliminating camera shake, composing thoughtful shots, and protecting the delicate marine environment.
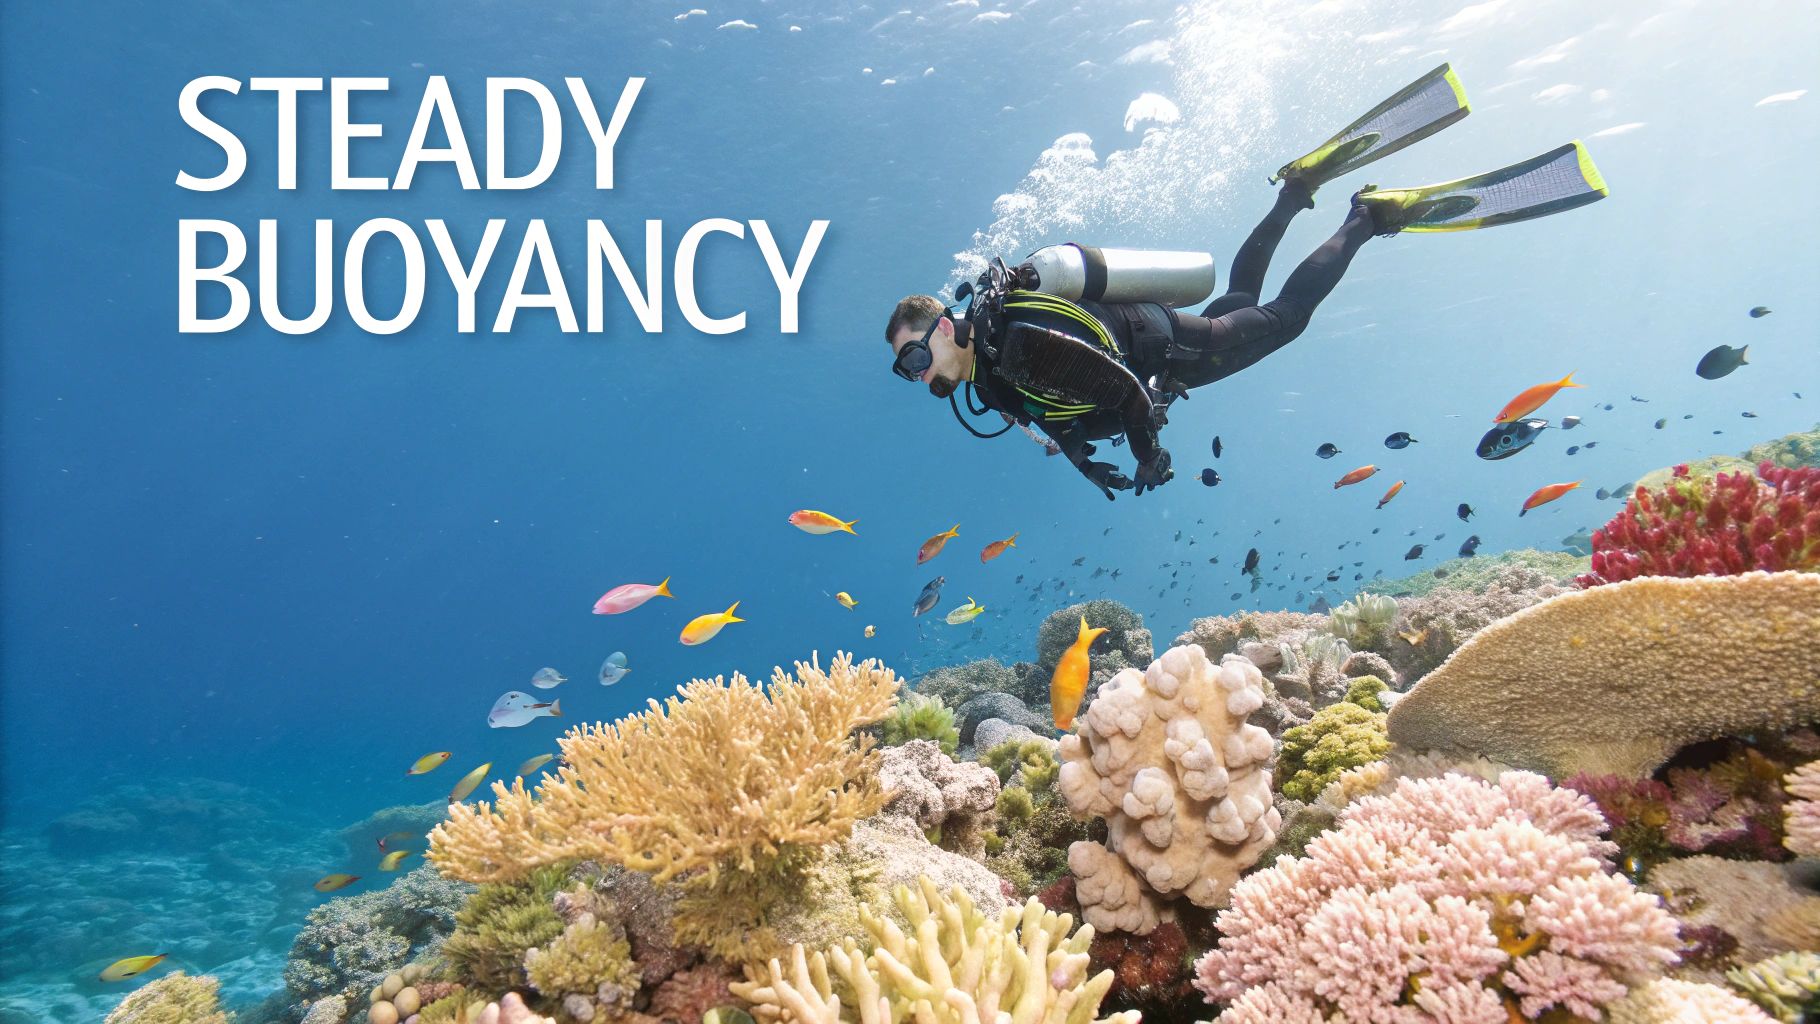
Think of it as setting up a tripod in mid-air. When you're perfectly neutral, you can hover effortlessly, getting close to subjects like a shy moray eel or a vibrant piece of coral without stirring up sand or silt that ruins your shot. This control not only leads to tack-sharp images but also demonstrates respect for the underwater world, a core principle of responsible diving and snorkeling.
How to Improve Your Buoyancy
Achieving this level of control requires practice and precision. It’s a skill that combines proper weighting, breathing techniques, and body positioning. If your core skills feel rusty or you want to build a solid foundation before investing in camera gear, it's always a good idea to take a diving lesson to refine your technique.
Here are a few actionable tips to implement on your next dive:
- Fine-Tune with Your Lungs: Use your breath for small vertical adjustments. A slow, deep inhalation will cause you to rise slightly, while a full exhalation will cause you to sink. Avoid using your BCD inflator for minor changes.
- Maintain Horizontal Trim: Keep your body parallel to the seafloor. This "streamlined" position minimizes drag and prevents your fins from kicking up sediment, which can create distracting backscatter in your photos.
- Practice Makes Perfect: Before a dedicated photo dive, spend time in a shallow, sandy area practicing hovering. Try to remain completely still at a specific depth for a full minute, using only your breath to maintain position.
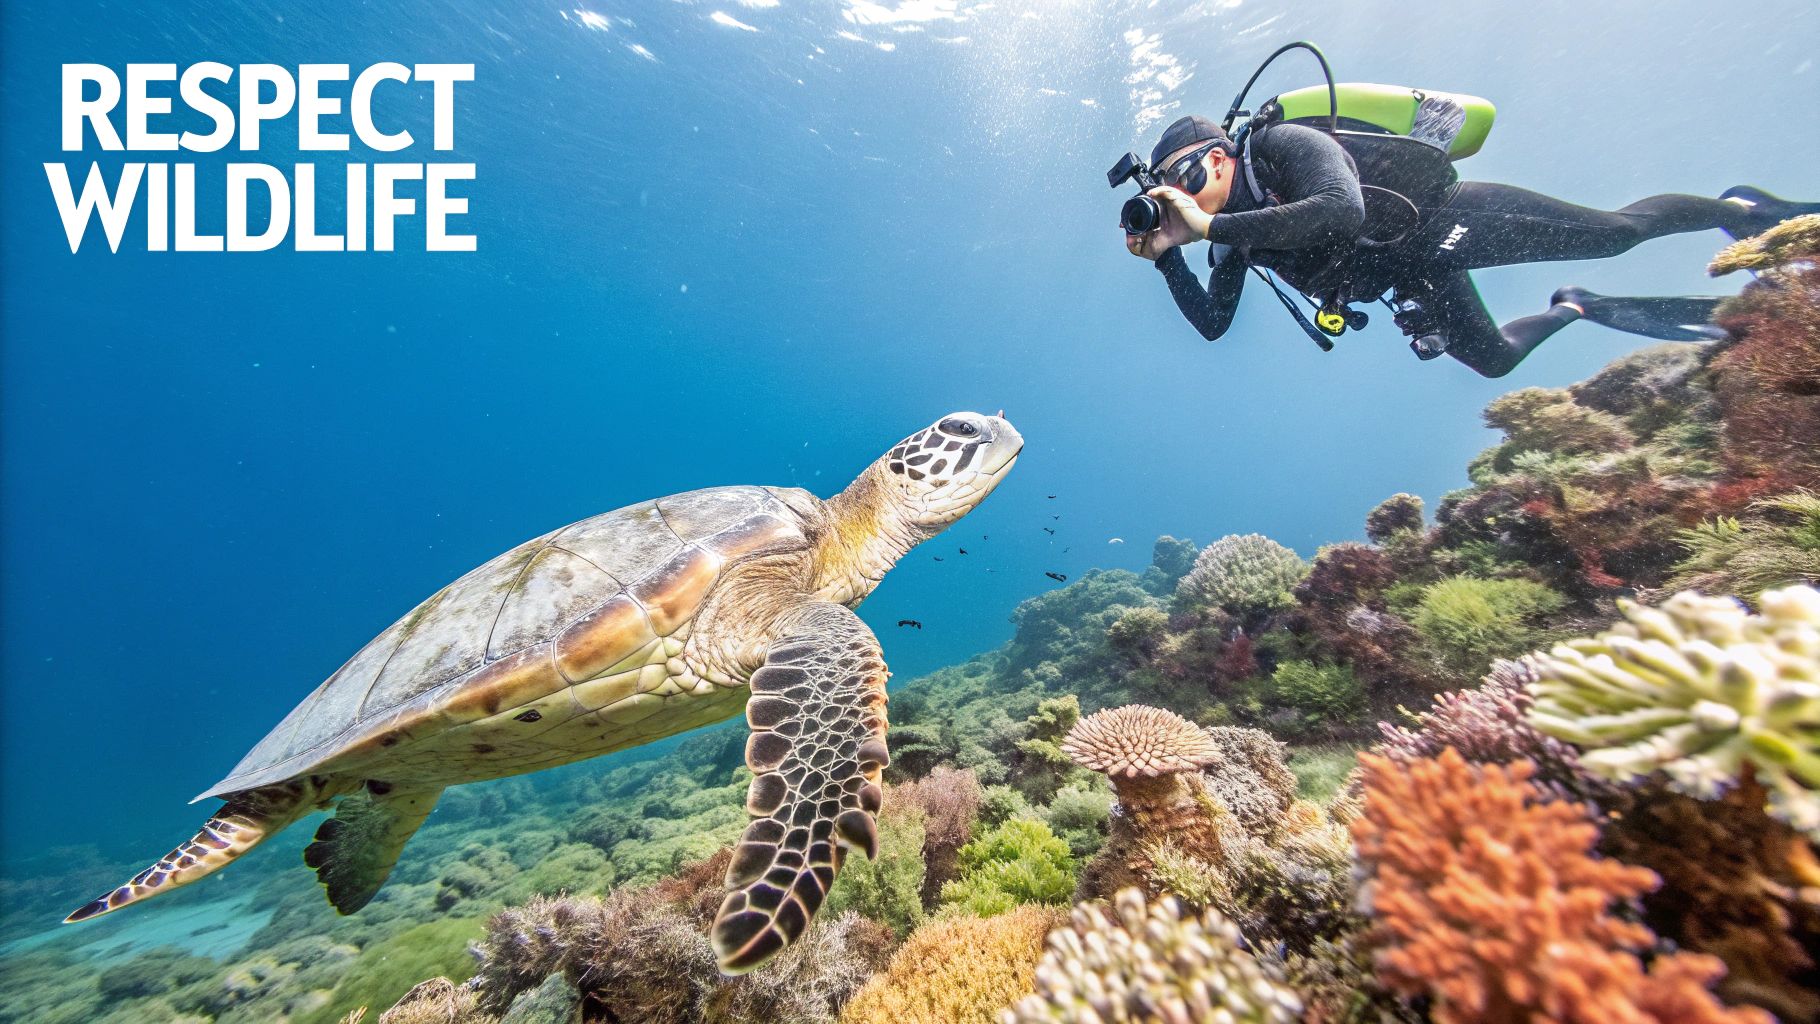
2. Get Close to Your Subject
The golden rule of underwater photography is simple: get close, then get closer. Water is incredibly dense and acts as a powerful filter, absorbing color and reducing contrast with every inch you put between your lens and your subject. By minimizing this "water column," you dramatically improve the vibrancy, sharpness, and overall impact of your images.
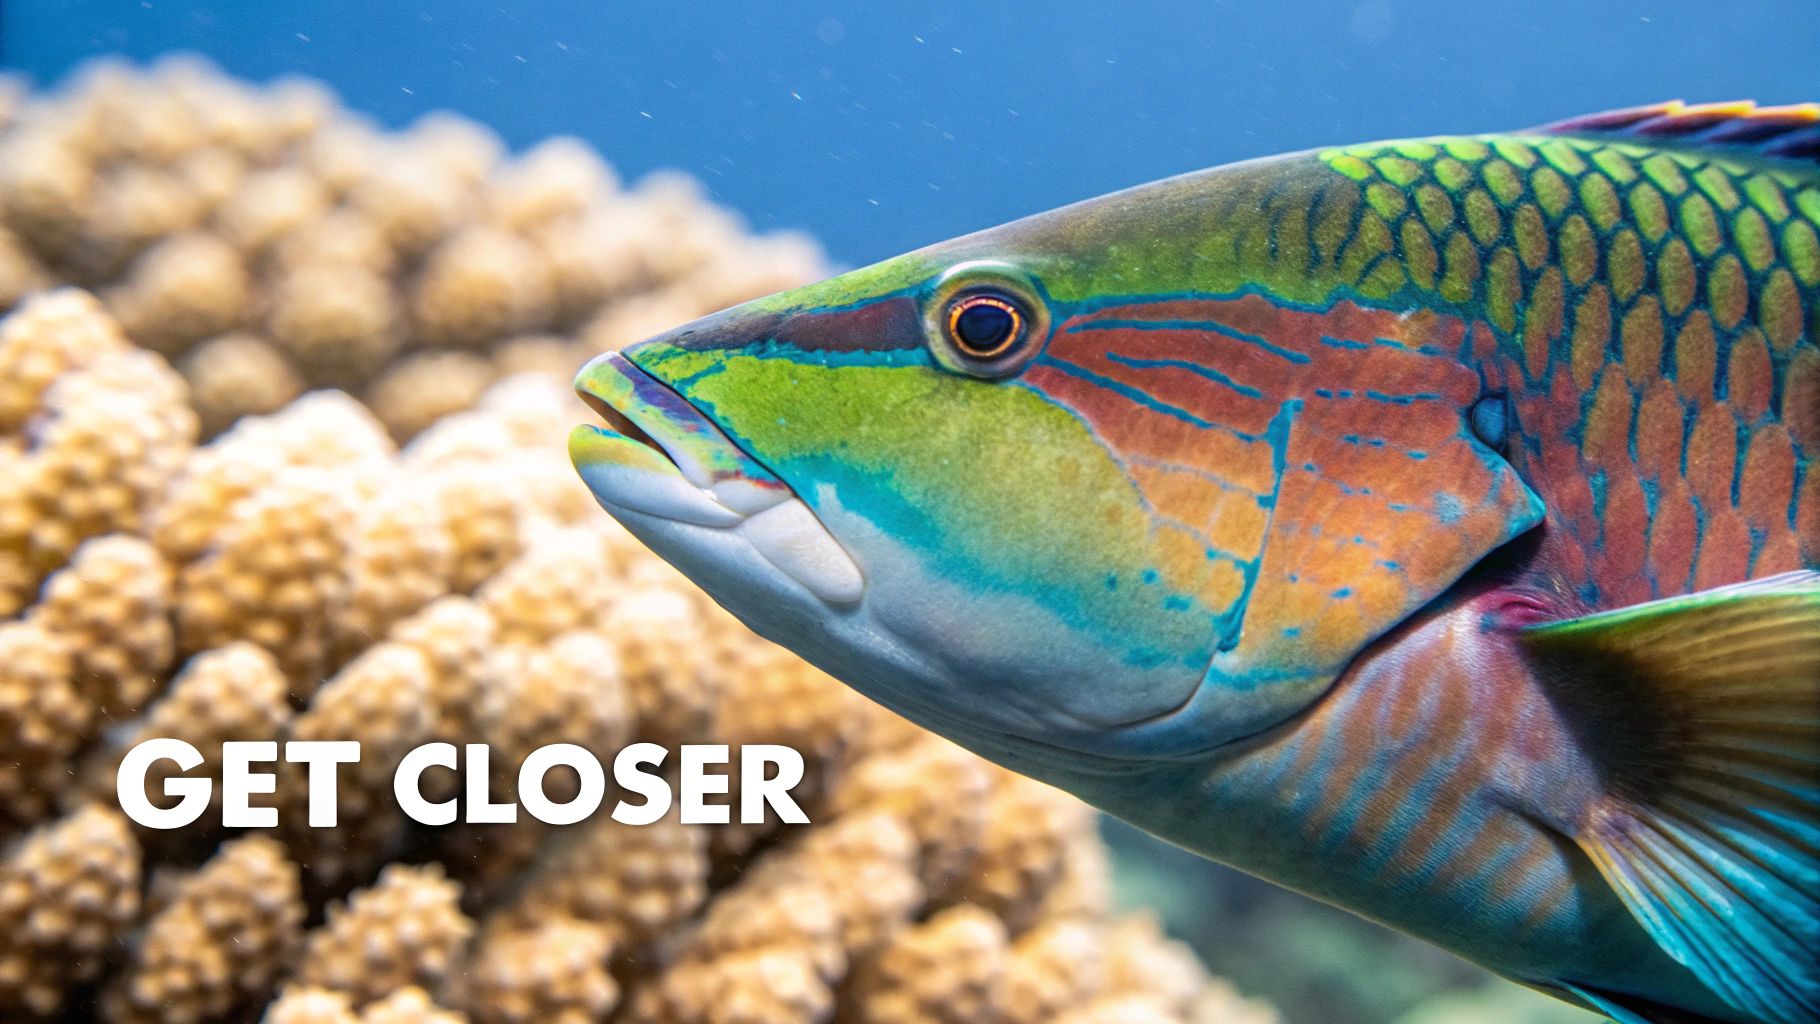
This principle is why a seemingly colorful reef can look blue and muted from just a few feet away. Closing the distance allows your camera's flash or natural light to illuminate the subject properly, revealing brilliant reds, oranges, and yellows that would otherwise be lost. Whether you're capturing the intricate patterns of a tiny nudibranch or the curious face of a green sea turtle, proximity is key to creating powerful, detail-rich photographs.
How to Safely Get Closer
Getting close requires patience and respect for marine life; it’s not about chasing animals. It’s about understanding their behavior and using slow, deliberate movements. This technique is one of the most effective underwater photography tips because it forces you to engage more thoughtfully with the environment. Improving your in-water comfort is a great first step, and these snorkeling tips for beginners can help build the confidence needed to approach subjects calmly.
Here are a few actionable strategies to close the distance responsibly:
- Move Slowly and Predictably: Avoid sudden movements that can startle marine creatures. Approach from the side rather than directly from above or head-on, which can be perceived as threatening.
- Anticipate Animal Behavior: Spend time observing a subject before you start shooting. Learn its patterns of movement, which will help you predict where it will be and position yourself for the perfect shot without causing stress.
- Use the Right Lens: For shy subjects, a macro or short telephoto lens allows you to fill the frame without getting physically on top of the animal, respecting its personal space while still achieving a tight composition.
3. Understand and Utilize Proper Lighting Techniques
Water acts as a giant blue filter, fundamentally changing how light behaves and how colors are perceived. As you descend, water absorbs the longer wavelengths of the light spectrum first, causing reds, oranges, and yellows to vanish quickly. This is why mastering both natural and artificial lighting is one of the most essential underwater photography tips for capturing the vibrant, colorful world hidden beneath the surface.
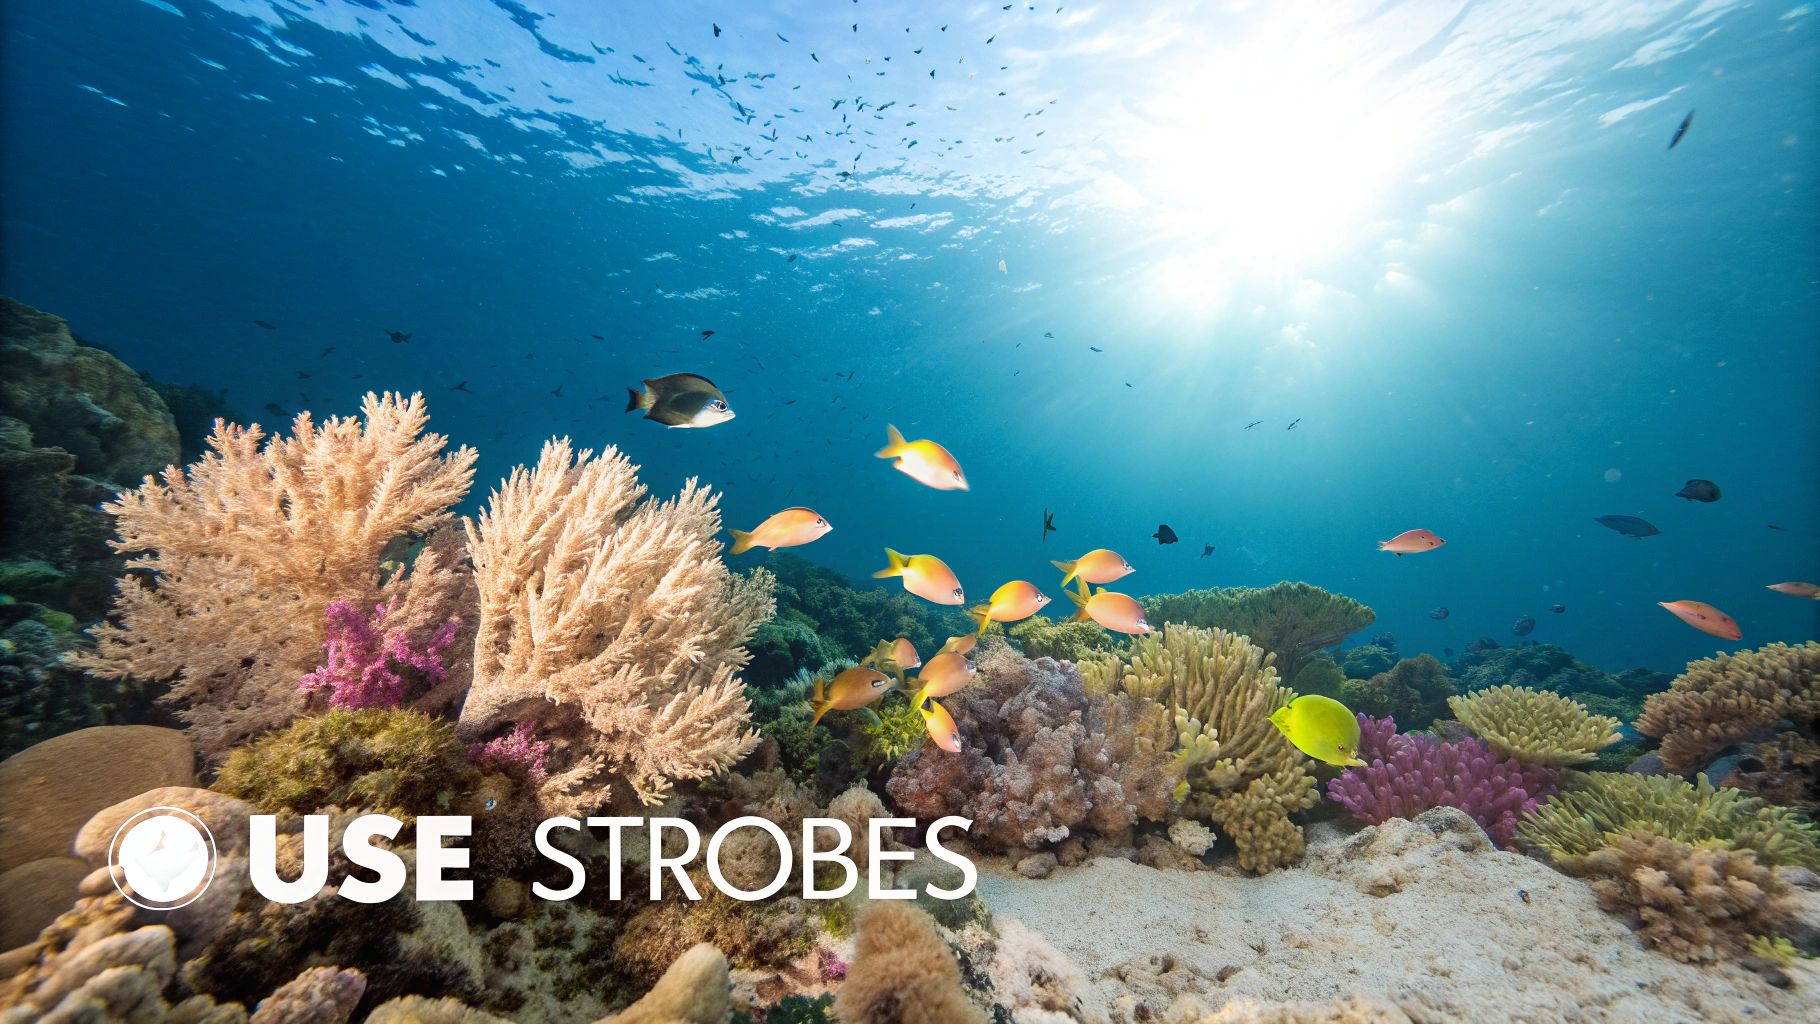
Without adding your own light source, like a strobe or video light, your images will be overwhelmingly blue and lack the punchy colors you see with your own eyes. Artificial light reintroduces those lost colors, revealing the true fiery reds of a sea fan or the brilliant orange of a clownfish. Understanding how to position and balance this light is the difference between a flat, monochrome photo and a dynamic, professional-quality image.
How to Improve Your Lighting
Properly lighting a scene underwater involves more than just pointing a flash at your subject; it requires a strategic approach to avoid common issues like backscatter (illuminated particles in the water). Mastering this skill will elevate your photos from simple snapshots to captivating portraits of marine life.
Here are a few actionable tips to implement on your next dive:
- Position Strobes to Avoid Backscatter: Move your strobes away from your camera lens and position them at a 45-degree angle, pointing slightly outward from your subject. This lights the subject from the side, not the water directly in front of your lens, dramatically reducing backscatter.
- Balance Ambient and Artificial Light: Don't let your strobes completely overpower the scene. Use them to illuminate your foreground subject while adjusting your camera's shutter speed to correctly expose the ambient light in the background, like the sunlit surface or a distant reef.
- Soften Your Light with Diffusers: Many strobes come with diffusers, which are translucent covers that soften the light output. Using them creates a more pleasing, even light on your subject, reducing harsh shadows and highlights, which is especially useful for macro photography.
4. Shoot in RAW Format for Maximum Post-Processing Flexibility
While it's tempting to use the default JPEG setting on your camera, switching to RAW format is a non-negotiable step for serious underwater photography. A RAW file is like a digital negative; it captures all the unprocessed data directly from the camera's sensor. This gives you complete control in post-processing to correct the unique challenges of shooting underwater, such as dramatic color loss and difficult lighting conditions.
Think of it as having the original ingredients to bake a cake from scratch versus using a pre-made mix. JPEGs are "baked in" by the camera, with colors, contrast, and sharpening already applied and much of the original data discarded. With a RAW file, you can restore the vibrant reds and yellows that disappear at depth, rescue details from shadowy crevices, and precisely adjust the white balance to make the water look crystal clear instead of murky green. This flexibility is one of the most powerful underwater photography tips for transforming good shots into great ones.
How to Leverage RAW Files
Working with RAW files requires a different workflow, but the payoff in image quality is immense. It starts with having the right equipment and ends with learning some basic editing software. Many of the best underwater cameras for snorkeling offer RAW capture capabilities, making this professional technique accessible to everyone.
Here are a few actionable tips for shooting and processing in RAW:
- Invest in Fast Memory Cards: RAW files are significantly larger than JPEGs, so you'll need high-capacity, high-speed memory cards (like SD or CFexpress) to avoid a full card mid-dive or slow buffer speeds.
- Learn Basic Editing Software: You don't need to be a professional editor. Programs like Adobe Lightroom or the free software that comes with your camera make it easy to adjust exposure, contrast, and, most importantly, white balance.
- Expose for the Highlights: While RAW offers incredible recovery potential, try to get the exposure right in-camera. Aim to avoid "clipping" or blowing out your brightest areas, as this data is often unrecoverable even in RAW.
- Create Underwater Presets: Once you find a color correction that works well for the local conditions, save it as a preset in your editing software. This will dramatically speed up your workflow for future photos from the same dive spot.
5. Master the Art of Composition with the Rule of Thirds
While the underwater world presents unique challenges, the fundamental principles of good photography still apply. Mastering composition is one of the most effective underwater photography tips to transform your snapshots into captivating images, and the rule of thirds is your most powerful tool. This guideline helps you create balanced and visually interesting photos by placing key elements off-center.
Imagine your frame is divided into nine equal squares by two horizontal and two vertical lines. The rule of thirds suggests placing your main subject, like a majestic sea turtle or a vibrant coral head, along these lines or at their intersections. This simple technique draws the viewer's eye into the scene more naturally than a centered subject, creating a sense of depth and dynamism that is especially effective in the three-dimensional aquatic environment.
How to Apply Composition Rules Underwater
Applying this principle can elevate a simple photo of a fish into a story. Positioning a fish so it appears to be swimming into the frame's empty space gives the image a sense of movement and direction. You can also use natural elements like coral formations or rock ledges as "leading lines" to guide the viewer’s gaze toward your subject.
Here are a few actionable tips to practice on your next Florida Keys snorkeling tour:
- Activate Your Grid: Most modern cameras, including GoPros, have an option to display a 3×3 grid on the LCD screen or in the viewfinder. Turn this on to make visualizing the rule of thirds effortless.
- Shoot with Intention: Before you press the shutter, take a moment to consider your composition. Try placing a diver along a vertical line or positioning the horizon (where the sand meets the reef) on the bottom horizontal line to emphasize the vastness of the water column.
- Embrace Negative Space: Use the open blue water as "negative space" to make your subject pop. Placing a colorful angelfish at a rule-of-thirds intersection with nothing but blue behind it creates a powerful, clean, and professional-looking image.
- Crop in Post-Production: Don't worry if your composition isn't perfect in the moment. You can often crop your photos later to refine the composition and better align your subject with the rule of thirds.
6. Choose the Right Camera Settings for Underwater Conditions
The underwater world presents a completely different set of rules for photography, rendering your typical land-based camera settings ineffective. Water absorbs light, alters colors, and is in constant motion, so understanding how to manually control your camera is essential. Mastering the balance between ISO, aperture, and shutter speed for this unique environment is a cornerstone of great underwater photography tips.
Dialing in the right settings allows you to freeze the motion of a passing sea turtle, capture the full depth of a vibrant coral reef, or properly expose a subject in the darker, deeper water. This technical control separates a lucky snapshot from a thoughtfully crafted, professional-quality image. It gives you the power to overcome the physical limitations of the aquatic environment and translate what you see into a stunning photograph.
How to Adjust Your Settings
The ideal settings will vary depending on water clarity, depth, available light, and your subject's behavior. The clear, warm waters you find when exploring the ocean temperatures in Marathon, FL will require different settings than a murky, deep-water dive. Start with these foundational adjustments and experiment on every dive.
- Use Fast Shutter Speeds: Aim for at least 1/125s to freeze the motion of fish and counteract your own movement. For faster subjects like dolphins or sharks, push it to 1/250s or higher.
- Set Aperture for Depth: For wide-angle reef scenes, use a smaller aperture (like f/8 or f/11) to maximize your depth of field and keep everything from the foreground coral to the background diver in sharp focus.
- Leverage Continuous Autofocus: The underwater world is rarely still. Set your camera to AI Servo (Canon) or AF-C (Nikon/Sony) to continuously track focus on moving subjects like schooling fish or curious turtles.
- Enable Back-Button Focus: Separating your focus activation from the shutter button gives you more precise control. You can lock focus on a subject and then wait for the perfect moment to press the shutter without the camera trying to refocus.
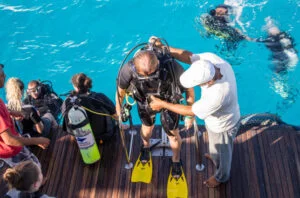
7. Invest in Quality Underwater Housing and Maintenance
Your camera is the heart of your setup, but its underwater housing is the life-support system. This specialized case is the single most critical piece of equipment protecting your expensive gear from the crushing pressure and corrosive saltwater of the marine environment. Investing in a quality housing isn't just about preventing a catastrophic flood; it's about gaining reliable, ergonomic access to your camera's controls, which is essential for creative underwater photography.
Think of the housing as the bridge between you and your camera. A well-designed model from a reputable brand like Ikelite, Nauticam, or SeaFrogs offers more than just waterproofing. It provides tactile feedback, allows you to adjust settings without fumbling, and is built to withstand the rigors of travel and repeated dives. Skimping on this component is a gamble that almost never pays off and can turn an amazing photo opportunity into a very expensive lesson.
How to Select and Maintain Your Housing
Proper selection and meticulous maintenance are non-negotiable for keeping your gear safe and functional. The right housing should feel like an extension of your camera, not a clumsy barrier. This is a key piece of gear for any serious underwater photography effort, from a casual Florida Keys snorkeling tour to a deep technical dive.
Here are a few actionable tips to protect your investment:
- Perform Pre-Dive Checks: Before every single dive, carefully inspect your main o-ring seal. Look for any debris like sand, hair, or lint. A single stray hair can compromise the seal and flood your entire setup.
- Rinse After Every Dive: As soon as you exit the water, thoroughly rinse the entire housing with fresh water. Work all the buttons and dials while rinsing to flush out any trapped salt or sand, which can cause them to seize up over time.
- Annual O-Ring Replacement: O-rings are perishable. Most manufacturers recommend replacing the main housing seal at least once a year, or more frequently if you dive often. It's a small expense that provides invaluable peace of mind.
- Do a Test Dunk: Before a big trip or after a long period of storage, assemble your housing without the camera inside and submerge it in a sink or shallow water. This simple test can reveal a slow leak before your camera is at risk.
8. Respect Marine Life and Environment
Beyond technical skills, the most important rule in underwater photography is to be a guest in the marine world, not an intruder. Ethical photography practices are not just about being a responsible diver; they are crucial for protecting fragile ecosystems and ensuring marine life behaves naturally, which leads to more authentic and powerful images. A stressed or fleeing animal never makes for a good photograph.
This approach, championed by marine conservationists and renowned photographers like Sylvia Earle, is built on a "do no harm" philosophy. It means observing from a distance, never touching or chasing wildlife, and leaving every coral reef and seagrass bed exactly as you found it. This respect not only preserves the underwater environment for future generations but also builds trust with marine creatures, allowing you to capture genuine moments of their lives without causing distress.
How to Practice Ethical Photography
Integrating respect into your photography workflow is a conscious choice that enhances both your experience and your results. It’s about prioritizing the well-being of the subject over getting the "perfect" shot. By adopting these principles, you become an ambassador for the ocean. This responsible approach is a core part of what defines sustainable tourism, ensuring our presence doesn't damage the natural wonders we came to see.
Here are a few actionable tips to implement on your next dive:
- Never Touch, Chase, or Corner: Let animals dictate the encounter. If a sea turtle or ray swims away, let it go. Chasing or cornering wildlife causes stress and can lead to defensive behaviors, which is dangerous for both you and the animal.
- Know Before You Go: Research local regulations and the behavior of the marine life you expect to see. For example, be aware of protected species and maintain legally required distances from marine mammals like dolphins or manatees.
- Mind Your Fins and Gear: Use excellent buoyancy control to stay off the seafloor and away from delicate corals. A single misplaced fin kick can destroy decades of coral growth. Secure your gauges and octopus so they don't drag and damage the reef.
Underwater Photography Tips: Key Strategy Comparison
| Technique / Aspect | Implementation Complexity 🔄 | Resource Requirements ⚡ | Expected Outcomes 📊 | Ideal Use Cases 💡 | Key Advantages ⭐ |
|---|---|---|---|---|---|
| Master Buoyancy Control for Sharp Images | High – requires advanced diving skills | Moderate – diving gear, practice time | Sharp, stable images; minimal sediment | Experienced divers in varied currents | Steady shots, environmental protection |
| Get Close to Your Subject | Medium – needs buoyancy and approach skills | Low – relies on skill, lenses | Vibrant colors, reduced backscatter | Macro, intimate wildlife photography | Enhanced sharpness and color fidelity |
| Proper Lighting Techniques | High – complex lighting setups | High – strobes, diffusers, backup lights | Restored colors, professional lighting effects | Low-light, deep, cave, and macro shoots | Natural color recovery, mood control |
| Shoot in RAW Format | Low – straightforward camera setting | Moderate – storage, post-processing tools | Maximum color correction, detail recovery | All underwater photography | Flexible editing, superior quality |
| Master Art of Composition (Rule of Thirds) | Low to Medium – creative application | Low – camera grid lines | Balanced, engaging images | Wide-angle scenes, marine life encounters | Dynamic compositions, eye guidance |
| Choose Right Camera Settings | Medium – requires camera system knowledge | Low – camera settings | Well-exposed, sharp images in varied conditions | Moving subjects, changing light conditions | Maximizes in-camera image quality |
| Invest in Underwater Housing & Maintenance | High – technical, costly investment | High – housing gear, ongoing maintenance | Protected equipment, accessible controls | All divers using cameras underwater | Equipment safety, full camera control |
| Respect Marine Life and Environment | Medium – requires ethics and awareness | Low – knowledge and discipline | Sustainable ecosystems, natural behavior | All underwater photographers | Conservation, ethical imagery |
Your Next Shot: Capturing the Best of the Florida Keys
Venturing into the ocean with a camera opens up a new world of creative possibilities. We have explored the fundamental pillars of stunning underwater photography, moving beyond simple snapshots to create truly compelling images. From mastering the subtle art of buoyancy to getting respectfully close to your subjects, each tip is a crucial piece of a larger puzzle. The journey from a novice to a proficient underwater photographer is one of patience, practice, and a deep appreciation for the aquatic environment.
The techniques discussed are not just abstract concepts; they are practical tools for your creative toolkit. Understanding how to harness light, whether natural or artificial, can transform a flat, blue-washed image into a vibrant and dynamic scene. Shooting in RAW format gives you the ultimate control in post-processing, allowing you to recover details and colors you thought were lost. Likewise, applying compositional rules like the Rule of Thirds helps you guide the viewer's eye, telling a more effective story with your photos. These foundational underwater photography tips are your roadmap to success.
From Theory to Practice: Your Florida Keys Studio
Ultimately, the most critical ingredient for improvement is time spent in the water. No amount of reading can replace the hands-on experience of adjusting your settings as a sea turtle glides by or stabilizing yourself to capture a sharp macro shot of a Christmas tree worm. The vibrant reefs around Marathon, such as the famous Coffins Patch, offer an unparalleled natural studio to apply these skills. With its clear turquoise waters and teeming marine life, it’s an ideal underwater classroom for photographers of all levels.
Remember the key takeaways from our guide:
- Stability is King: Your buoyancy control is the foundation of every sharp, well-composed shot.
- Embrace Proximity: Get close to your subject to reduce water distortion and fill the frame with color and detail.
- Light is Everything: Use strobes or natural light effectively to restore the brilliant colors of the reef.
- Post-Processing Power: Shoot in RAW to unlock the full potential of your images during editing.
- Ethical Photography: Always prioritize the well-being of marine life and their habitat. Your best shot is never worth stressing an animal or damaging coral.
Mastering these skills transforms your snorkeling or diving trips from simple sightseeing excursions into creative expeditions. It’s about capturing the magic of the underwater world and sharing its beauty, fostering a deeper connection and a desire to protect these fragile ecosystems.
Ready to put these expert underwater photography tips into practice in one of the most beautiful settings in the world? Join Marathon Snorkeling And Sunset Cruise for an unforgettable adventure to the best reef spots in the Florida Keys. Our experienced, lifeguard-certified crew will guide you to pristine locations, ensuring a safe and personalized experience as you capture your next masterpiece. Book your trip with Marathon Snorkeling And Sunset Cruise today and turn your knowledge into breathtaking images