How to Take Underwater Photos Like a Pro

Taking your first underwater photos all starts with the right gear, but don't worry—this doesn't mean you need a super complex or expensive setup. The real key is to pick a camera and housing that fit your goals and budget. It could be a simple action camera for snorkeling or a more capable compact system if you plan on diving deeper.
Choosing Your First Underwater Camera Setup
Diving into underwater photography is an awesome journey, and picking your first camera rig is where it all begins. The options can feel a bit overwhelming, especially since the underwater camera market is booming. It grew from USD 6.27 billion to an estimated USD 7.04 billion in just a single year, which tells you a lot about how many people are getting hooked on capturing the world beneath the waves.
But a good starting point is often much simpler than you think.
A lot of photographers, myself included, got their start with a basic compact camera. This approach lets you learn the really important stuff—like how light behaves underwater, what makes a good composition, and how to anticipate marine life—without getting bogged down by a complicated pro system.
Why Simpler is Often Better
When you're just starting, your main focus should be on building skills, not fumbling with gear. A simpler setup has some pretty clear advantages:
- Less Task Loading: Let's be real, juggling your buoyancy, navigating a reef, and keeping an eye out for cool critters is already a handful. A simple camera lets you actually focus on the experience.
- Lower Initial Investment: You can get a feel for the hobby without dropping a ton of cash. This makes it way easier to decide if you want to upgrade later on.
- Greater Portability: Smaller rigs are just plain easier to travel with and handle in the water, especially if you're snorkeling or doing casual shore dives.
The best camera is the one you have with you and feel comfortable using. Don’t let the hunt for "perfect" gear stop you from just getting in the water and starting to shoot.
The goal is to find a setup that empowers you, not one that intimidates you. For anyone just starting out with snorkeling, our guide on the best underwater cameras for snorkeling has some great recommendations for user-friendly options that still deliver fantastic results.
Comparing Underwater Camera Setups for Beginners
To help you figure out where to start, here's a quick comparison of the most common entry-level camera systems.
| Camera Type | Best For | Pros | Cons |
|---|---|---|---|
| Action Camera | Snorkeling, shallow dives, video | Extremely durable, compact, wide-angle view, affordable | Limited manual controls, weaker performance in low light |
| Waterproof Compact | All-around beginner photography | Good image quality, some manual controls, no housing needed for shallow depths | Limited lens options, may need a separate housing for deeper dives |
| Compact Camera + Housing | Aspiring photographers who want to learn | Full manual control, excellent image quality, interchangeable lens ports on some models | Higher initial cost, bulkier than other options |
Each of these setups has its place, and your choice really comes down to how deep you plan to go—both literally and into the hobby itself.
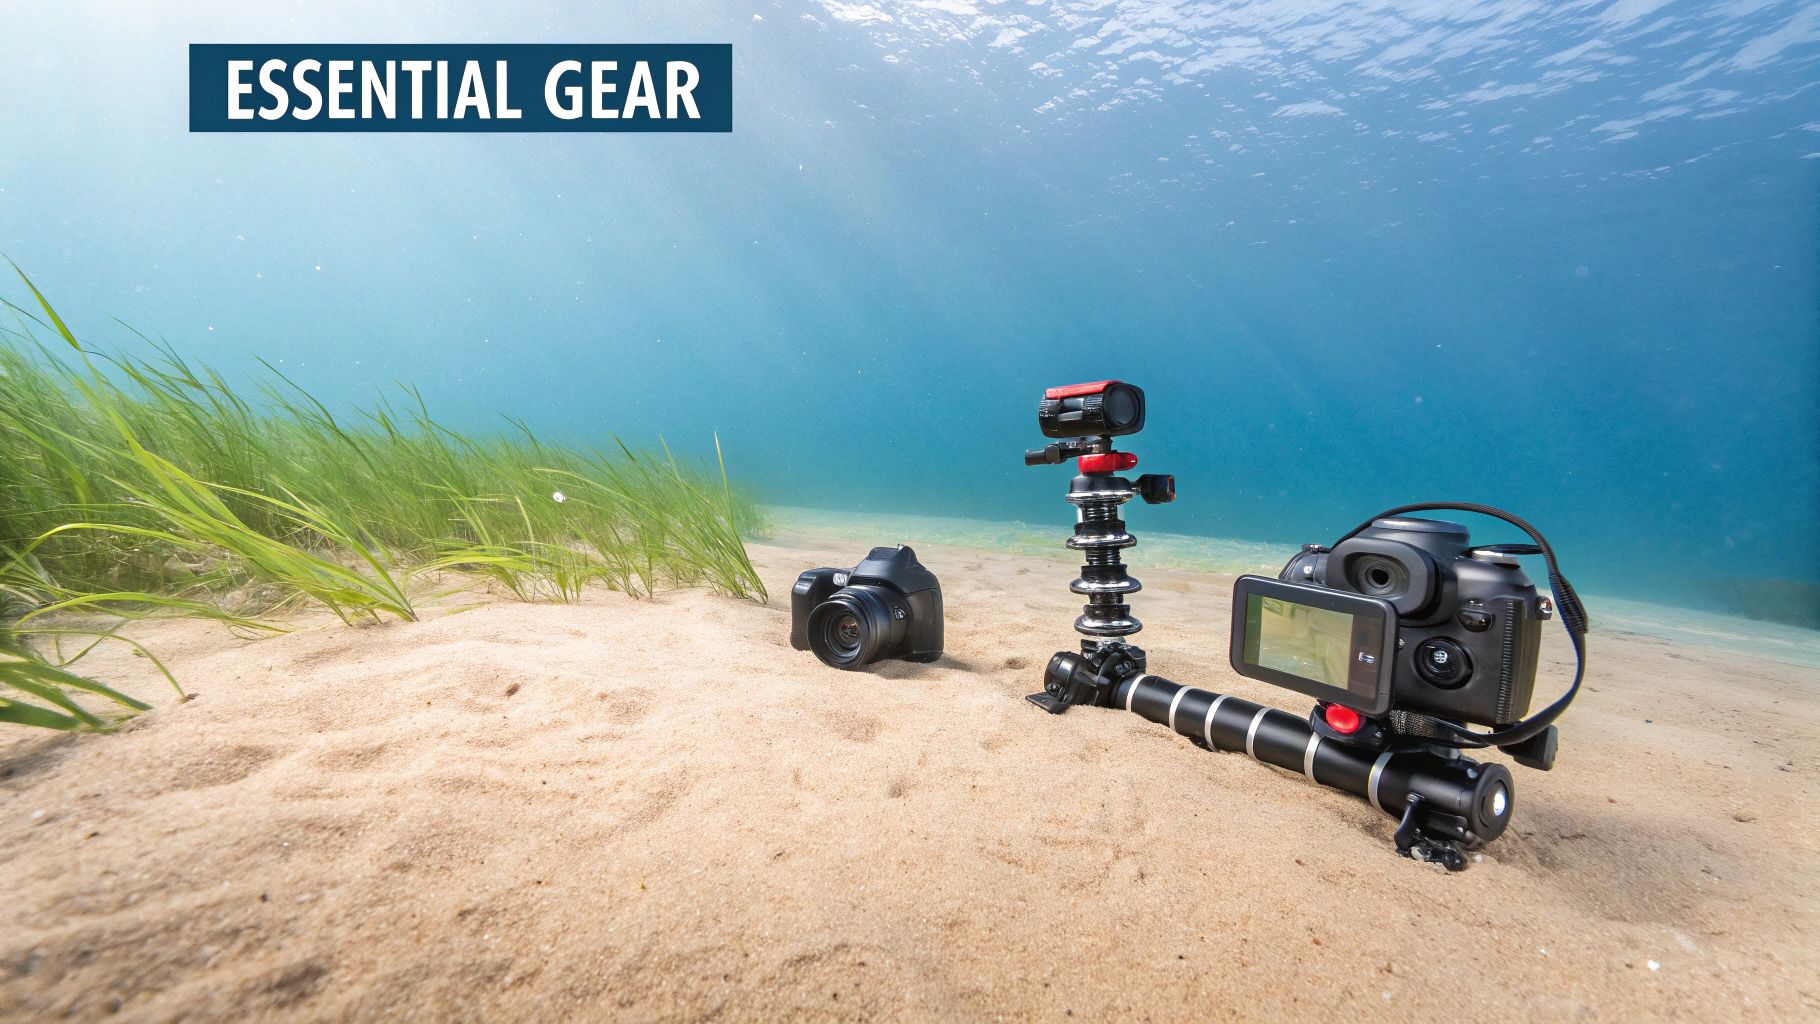
What Really Matters in a Housing
The underwater housing is every bit as important as the camera inside it. Think of it as the armor that keeps your expensive electronics safe from crushing pressure and corrosive saltwater. When you're looking at different housings, these are the features you should really focus on.
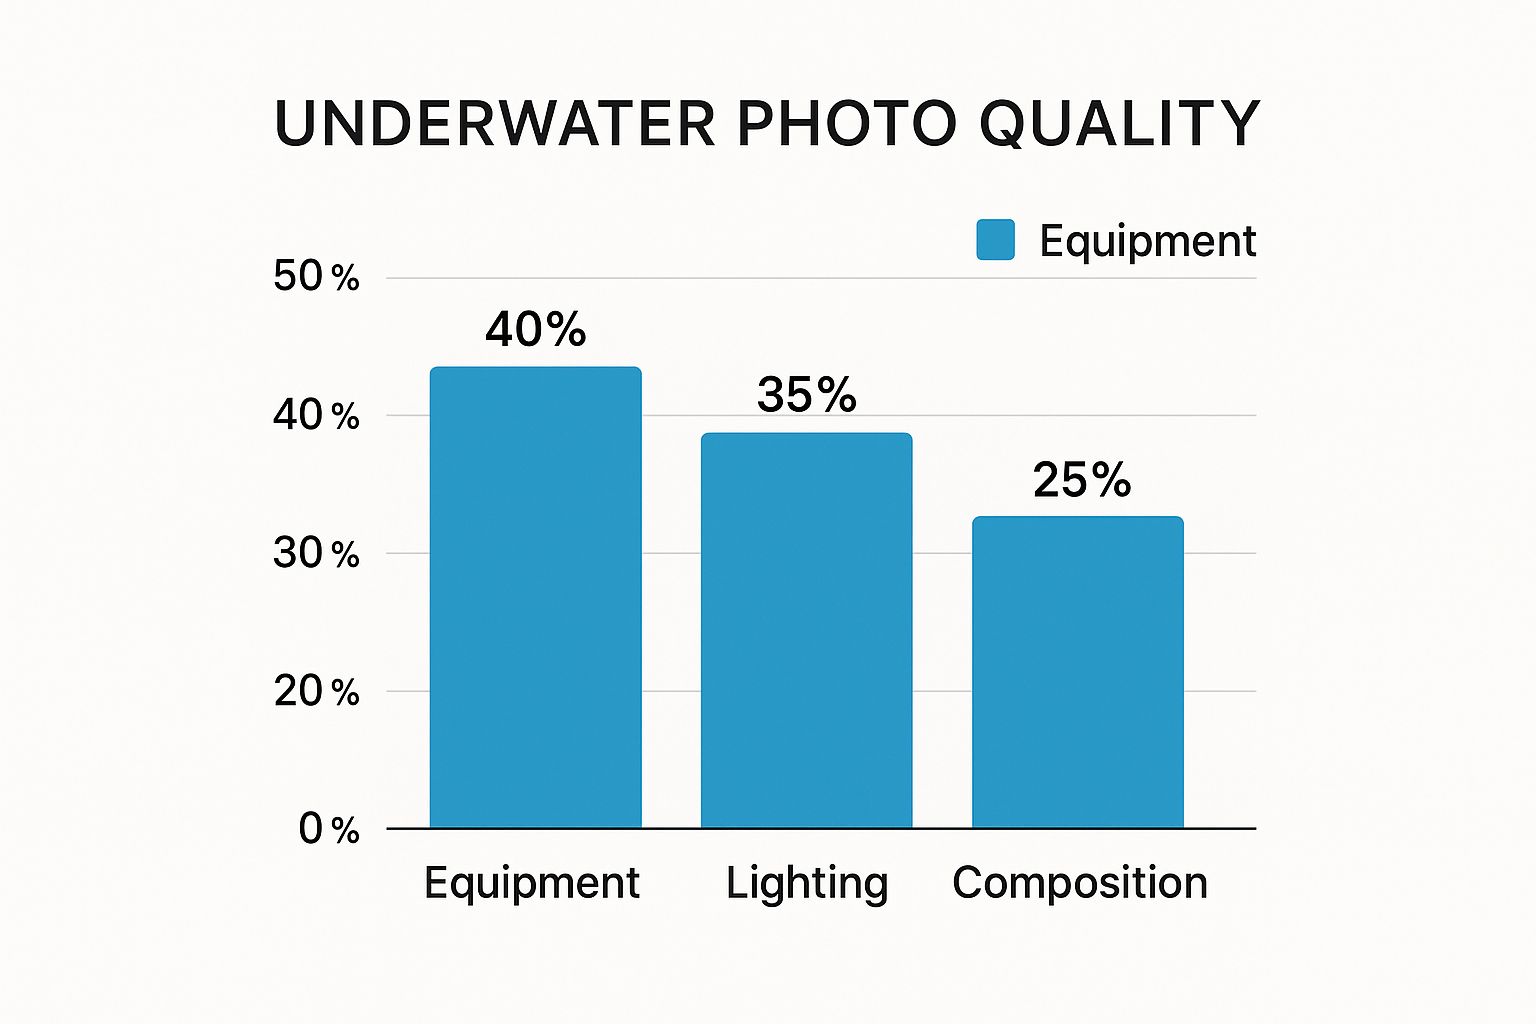
This image really drives the point home. While your equipment is a big piece of the puzzle at 40%, mastering lighting and composition is almost just as critical. A great camera won't save a poorly lit or badly composed shot.
Because of this, your first housing should be a tool that helps you learn. Make sure its depth rating is well beyond where you plan to dive. And check that the buttons are big and easy to press, even if you’re wearing gloves. Having easy access to key controls like shutter speed and aperture is what will allow you to finally move past "auto" mode and start taking real creative control of your images.
Nailing Your Camera Settings for Underwater Clarity
Once your head dips below the surface, you’re not just in a different world; you’re in a different physical environment. Water is incredibly effective at absorbing light and color, which is why everything can quickly look muted and blue. Getting out of "Auto" mode is your first real step toward fighting back and capturing the vibrant scenes you see with your own eyes.
This isn't about memorizing complex formulas. It's about understanding a few core settings that hand you creative control. Learning to adjust these manually is what turns a flat, blue-green snapshot into a sharp, colorful photograph.
Your Secret Weapon: Shoot in RAW
If you only change one thing, make it this: switch your image quality from JPEG to RAW. Think of a JPEG as a finished cake; the camera has already baked in all the color, contrast, and sharpening. A RAW file, on the other hand, is like having all the raw ingredients on the counter.
This gives you an incredible amount of flexibility when you get to the editing stage. You can adjust the white balance, pull details out of deep shadows and bright highlights, and fine-tune colors in ways that are simply impossible with a JPEG. Honestly, it’s the foundation for any serious attempt at learning how to take great underwater photos.
The goal isn't just to take a picture, but to capture data. Shooting in RAW gives your editing software the maximum amount of information to work with, letting you bring back all the brilliant colors that water steals.
Reclaiming Color with Custom White Balance
Water is a thief. It filters out the warmer colors of the light spectrum first—reds disappear around 15 feet, followed quickly by oranges and yellows. Your camera's auto white balance just can't keep up with this, which is why you end up with that overwhelming blue or green tint.
Setting a custom white balance is your in-camera solution. At your shooting depth, just point your camera at something neutral white or gray (a dive slate or even a patch of white sand works great) and tell the camera, "Hey, this is white." This one simple step can dramatically improve your colors right out of the gate. Water conditions can affect this, and knowing the typical Florida Keys water temperature and clarity for your location can help you anticipate how much color correction you'll need.
Essential Settings for Freezing Motion and Getting Focus
Beyond just color, you need to tell your camera how to handle motion and focus. These three settings—shutter speed, aperture, and ISO—are known as the exposure triangle, and they all work together.
-
Shutter Speed: This is how long the camera's sensor is exposed to light. To freeze a fast-moving fish in its tracks, you’ll need a quick shutter speed, like 1/250s or faster. For something stationary like coral, you can get away with a much slower speed.
-
Aperture (f-stop): This controls how much of your scene is in focus. A wide aperture (a low f-number, like f/2.8) creates that beautiful blurry background that makes your subject pop—perfect for a tiny nudibranch. A narrow aperture (a high f-number, like f/11) keeps more of the scene sharp, which is what you'll want for those sweeping wide-angle reef shots.
-
ISO: This is your camera's sensitivity to light. You want to keep it as low as possible to avoid grainy, noisy photos. But as you go deeper and the light fades, you'll have to bump up the ISO to compensate. Just be aware that a higher ISO introduces more of that digital "noise."
For a solid starting point in bright, shallow water, try these settings:
- Mode: Manual (M)
- ISO: 100-200
- Aperture: f/8
- Shutter Speed: 1/160s
From here, you can tweak each setting based on the available light and whatever incredible subject swims into your frame. This control is what separates a lucky shot from a well-crafted image.
Mastering Light and Color Beneath the Waves
This is where good underwater photos become great ones. Learning to tackle the single biggest challenge in photography—light—is what separates a memorable image from just another blue-tinted snapshot. Once you get a handle on how light and color behave underwater, you'll see a massive leap in the quality of your work.
The moment you slip beneath the surface, the water starts to act like a giant filter, absorbing the warmer wavelengths of light. Reds and oranges are the first to vanish, often disappearing within the first 15-20 feet. This is exactly why so many unlit photos look disappointingly flat, blue, or green.
To fight back, you need to bring your own light source. An external strobe (what we call a flash on land) is the essential tool that brings that lost vibrancy roaring back. It reintroduces the brilliant reds, oranges, and yellows that make a coral reef scene so spectacular.
Eliminating Backscatter with Proper Strobe Positioning
One of the biggest frustrations for new underwater photographers is backscatter. You know what I'm talking about—those ugly white specks that look like a snowstorm in your photos. This happens when your flash lights up all the tiny particles floating in the water between your lens and your subject.
The solution is all about smart positioning. By moving your strobes away from the camera and aiming them just right, you can light your subject without illuminating the water directly in front of your lens.
- Single Strobe: Position it above and to one side of your housing, angled slightly outward. This creates a really pleasing light with soft, natural-looking shadows.
- Dual Strobes: This is the ideal setup. Place them on either side of your housing, like two outstretched arms. This gives you even, comprehensive lighting and minimizes harsh shadows, giving your images a much more polished, professional look.
Your goal is to create a "triangle of light" between your two strobes and your subject, leaving the water column right in front of your lens unlit. Honestly, this simple technique is a complete game-changer for getting clean, crisp images.
Getting Creative with Ambient Light
But strobes aren't your only tool! The sun, or ambient light, can be your best friend for creating stunning, artistic effects. One of my favorite techniques is to shoot upwards toward the surface.
This approach lets you capture dramatic silhouettes of bigger subjects like sea turtles, rays, or even your dive buddy against a beautiful backdrop of sun rays filtering through the water. It turns a potential lighting problem into a powerful compositional element.
TTL vs. Manual: Taking Control of Your Strobes
Modern strobes give you two main ways to control their power, and knowing when to use each is key.
- TTL (Through-The-Lens): Think of this as the "auto" mode. Your camera talks to the strobe and automatically figures out the right amount of flash for a good exposure. It’s fantastic for shooting fast-moving subjects where you just don't have time to mess with settings.
- Manual (M): Here, you're in the driver's seat. You set the strobe's power level yourself, which allows for precise, consistent, and creative lighting. This is the go-to mode for static subjects, macro photography, and anytime you want a specific artistic effect.
Understanding these lighting techniques is absolutely essential. Underwater photography throws unique curveballs at you, from light absorption to color distortion. With over 6 million certified divers worldwide and roughly 50% of them getting into underwater photography, there's a huge community dedicated to overcoming these hurdles. You can dive deeper into the growth of underwater imaging technology on expertmarketresearch.com.
Knowing how to control light is what empowers you to create vivid, pro-level images in any condition, whether you're exploring the crystal-clear waters on a trip to the Florida Keys or a darker, moodier shipwreck. For more on planning a trip to that amazing spot, check out our guide on the best time to visit the Florida Keys.
Proven Techniques for Photographing Marine Life
Getting incredible shots of marine life isn't about luck. It's a mix of patience, solid technique, and a deep respect for the underwater world. If I could give just one piece of advice that would instantly transform your photos, it would be this: get close, and then get even closer.
That single action changes everything. When you shrink the distance between your lens and your subject, you're cutting through all the water that scatters light and makes images look hazy and washed out. Less water means more sharpness, richer colors, and details that truly pop.
Approach With Patience and Respect
The absolute best wildlife encounters happen when the animal feels safe and undisturbed. If you see a sea turtle, for example, the worst thing you can do is chase it from behind or charge at it head-on. The key is to approach slowly, from the side, giving it a clear path to move on.
This non-threatening approach keeps the animal from feeling cornered or stressed out. More often than not, it results in a much longer and more rewarding interaction for both of you.
Sudden, jerky movements are a guaranteed way to send your subject darting for cover. Instead, rely on slow, deliberate fin kicks. Try to read the animal's behavior and anticipate its path. If you can position yourself where it's headed, you can let it come to you, creating a far more natural and relaxed photo opportunity.
Your goal is always to be a passive observer. Your presence should never alter an animal's natural behavior. A photo of a stressed or fleeing creature isn't a success, no matter how technically perfect it is.
Perfect Your Buoyancy for a Stable Platform
Mastering your buoyancy is, without a doubt, the most critical skill for any underwater photographer. It's what allows you to hover effortlessly in the water, creating a rock-steady shooting platform without stirring up sand or—even worse—damaging fragile coral. Think of it as your built-in underwater tripod.
When your buoyancy is dialed in, you gain the freedom to:
- Hold steady for macro shots: Photographing tiny critters requires immense stability. Even the slightest wobble can throw your focus off completely. Neutral buoyancy lets you stay perfectly still.
- Compose with care: You can take all the time you need to frame your shot, tweak your settings, and wait for that perfect moment without drifting away.
- Protect the reef: By floating just above the reef instead of resting on it, you ensure the delicate ecosystem below remains untouched by your fins or gear.
This skill is absolutely fundamental. If you're still getting comfortable in the water, brushing up on some essential snorkeling tips for beginners can be a huge help in building your confidence and control.
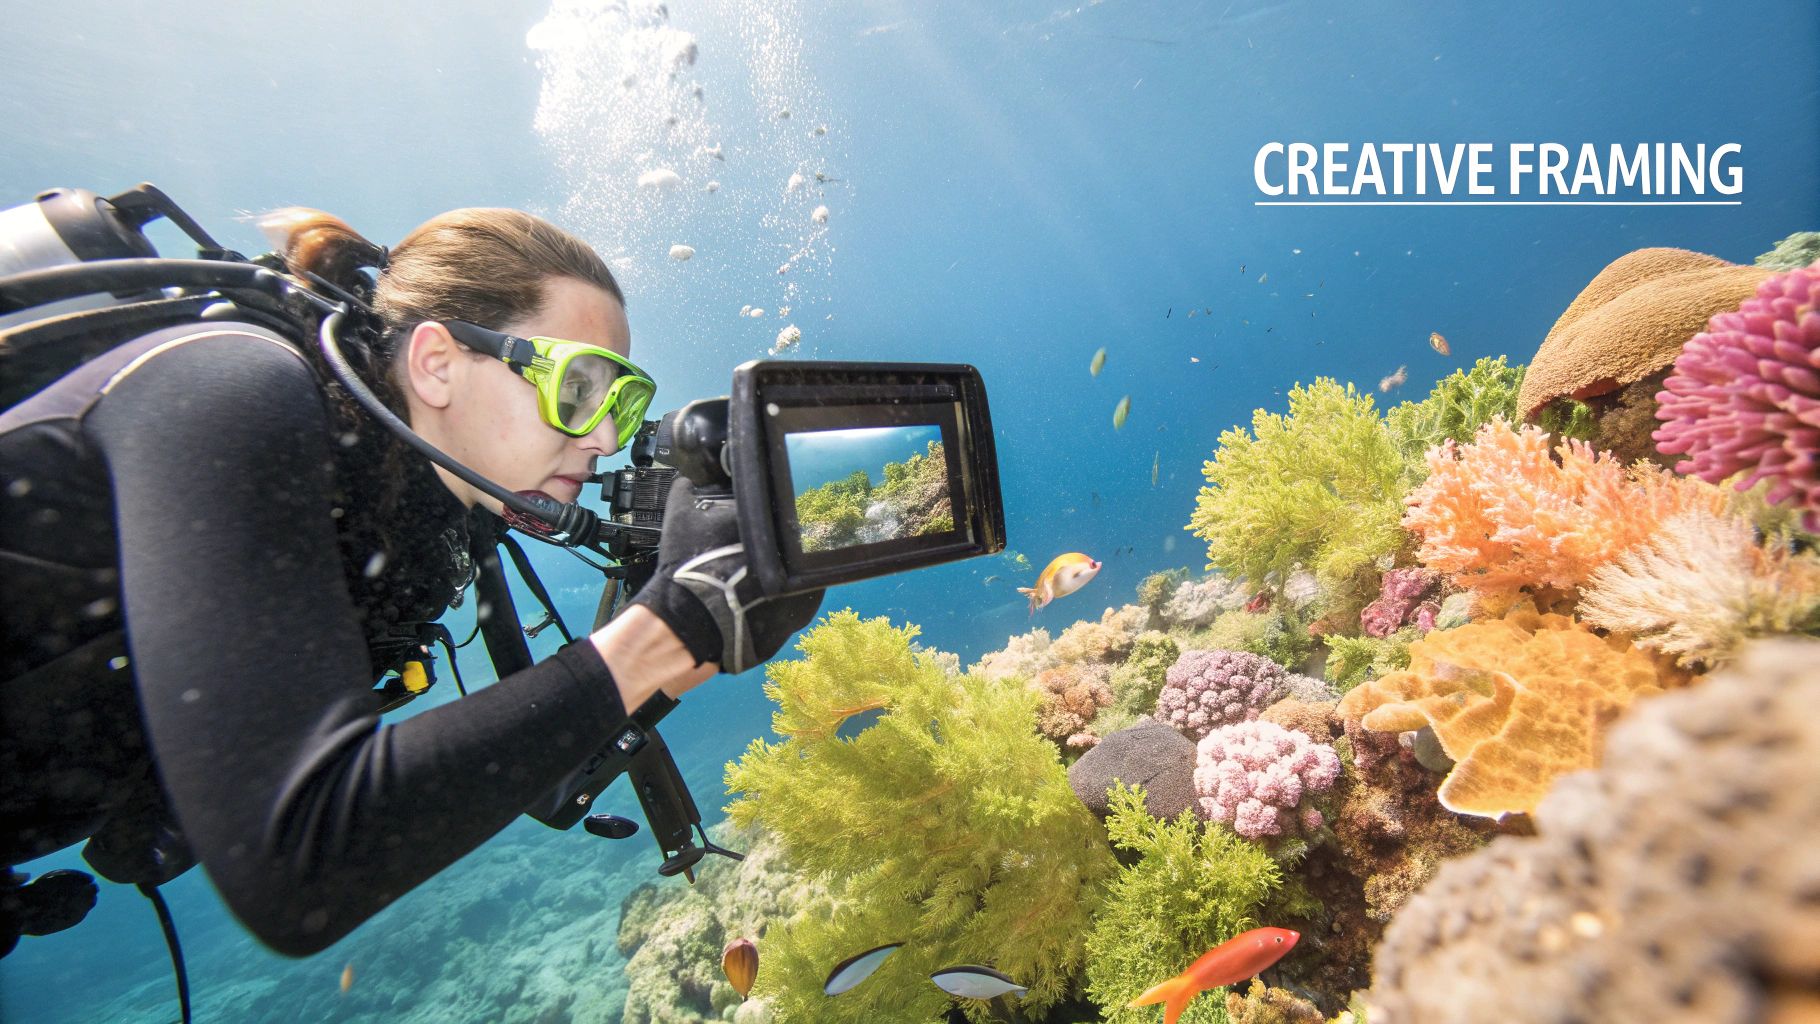
Compose Your Shots for Maximum Impact
How you frame a subject is what separates a simple snapshot from a breathtaking piece of art. A few classic composition rules work wonders underwater, and the most powerful is the rule of thirds.
Just imagine your screen is divided by a 3×3 grid. Instead of centering your subject, place it along one of the lines or at an intersection. This instantly creates a more balanced, dynamic, and visually engaging image. It’s a simple trick with a huge impact.
Another killer technique is to get down to eye level with your subject. Shooting slightly upward makes the animal feel more majestic and powerful. This perspective creates a much more intimate connection with the viewer than a top-down shot ever could.
Once you’ve got the technical skills down, exploring powerful visual storytelling techniques can help you create images that tell a story. Combining these creative principles with solid in-water skills will completely change the way you see and capture the magic of the world beneath the waves.
Bringing Your Images to Life in Post-Processing
The perfect shot often isn’t captured in the water—it’s revealed on your computer. Post-processing is where the magic really happens, transforming a good image into a jaw-dropping one. With software like Adobe Lightroom, just a few simple adjustments can make all the difference in the world.
This final touch is where you truly bring your underwater vision to life. It’s less about "fixing" a photo and more about enhancing the beauty that was already there, buried under layers of blue or green haze.
Start with Color Correction
First thing's first: white balance. This is the most crucial adjustment you'll make. Because water naturally filters out red and yellow light, your photos will almost always have a strong blue or green color cast. Using the white balance slider or the eyedropper tool in Lightroom helps you reclaim those lost colors instantly.
This single tweak brings back natural-looking tones, making the sand look white again and the fish pop in their true, vibrant hues. It's the foundation for every other edit you’ll make.
Post-processing isn’t about faking a moment; it's about restoring the reality of what you saw. Your goal is to make the image on your screen match the vivid memory from your dive.
Enhance Clarity and Contrast
Once your colors are looking good, it's time to make your subject pop. Adjusting contrast helps separate your subject from the background, while the dehaze tool is an absolute game-changer for underwater shots. It cuts right through the water's haze, adding incredible depth and clarity.
- Boost Contrast: This makes the brights brighter and the darks darker, giving the image more punch.
- Increase Dehaze: Use this slider carefully, as a little goes a long way. It dramatically improves sharpness by reducing water murkiness.
- Remove Backscatter: For those annoying little white specks, the spot removal tool is your best friend. Simply click on each particle to make it disappear, cleaning up your photo for a professional finish.
The industry itself is blowing up, with the underwater camera market expected to grow from USD 10.4 billion to USD 42.1 billion. This growth is fueled by cool advancements like AI stabilization and cloud connectivity, which will only make our post-processing workflows even more powerful. Remember that all this editing work happens on a computer, and getting your gear safely from the boat to shore requires a good bag. You can learn more in our article about what to bring on a boat trip.
Common Questions About Taking Underwater Photos
Even after you’ve got your gear sorted and practiced your techniques, questions are bound to pop up. It’s all part of the process! Let's dive into a few of the most common ones I hear—and a few I remember asking myself when I first started out.
Getting these answers straight will help you build confidence and get you on the fast track to taking better photos.
Do I Really Need an External Flash to Start?
You don't absolutely need a strobe for your very first time in shallow, sunny water, but it's easily the single most important upgrade you can make. The built-in flash on your camera is just way too close to the lens. All it does is light up every bit of floating particle in the water, creating a snowstorm of distracting white specks called backscatter.
An external strobe, on the other hand, moves that light source away from your lens, which is the secret to getting clean, professional-looking shots. More importantly, it punches through the water to bring back all the vibrant reds, oranges, and yellows that get absorbed, turning a flat, blue-ish photo into something truly stunning. If you're serious about this, a strobe should be your first big investment.
What Is the Biggest Mistake Beginners Make?
This one’s easy. By far, the biggest mistake is not getting close enough to your subject. Water is like a thick fog; it sucks the clarity, color, and contrast right out of your image. The more water between your lens and that cool fish you’re trying to shoot, the murkier your photo will look.
The golden rule for underwater photography is simple: estimate your distance to the subject, then cut it in half. This is exactly why mastering your buoyancy is so critical—it lets you get in close safely without kicking up sand or disturbing the wildlife.
Is a GoPro Good Enough for Underwater Photos?
A GoPro is a fantastic, and surprisingly affordable, starting point. They're built like tanks, are super easy to use, and capture amazing video alongside some pretty solid photos. If you want to get the best results right away, grab a red filter. It does wonders for color correction in blue water.
For anything up close, a simple tray with a couple of small video lights will make a huge difference. Sure, you won't get the manual controls or the insane image quality of a dedicated camera system, but it's the perfect tool for practicing your composition and figuring out if this whole underwater photography thing is for you.
Ready to capture your own stunning underwater moments? Join Marathon Snorkeling And Sunset Cruise for an unforgettable trip to the beautiful reefs of the Florida Keys. Our expert crew, recognized as the Best in Marathon, will guide you to the perfect spots for amazing photos. Book your adventure today